.webp) h5gameplanet.com
h5gameplanet.comAniimo Combat Team Building Guide: How to Break Enemies, Time Twine, and Win Difficult Fights

Aniimo’s combat becomes much more manageable once you stop treating your four-Aniimo roster as four independent creatures and start treating it as a sequence of jobs. The most important sequence for difficult fights is simple: identify the target’s elemental situation, build BREAK efficiently, force the enemy into a vulnerable state, then use your strongest damage window while your team keeps itself alive. Aniimo is built around real-time combat rather than a traditional turn queue, and its Twine mechanic lets the Pathfinder directly inhabit a selected Aniimo, making positioning, timing, swapping, and ability usage part of the same system. The game’s live-service development also means individual numbers and balance details can change, while the fundamental principles of team construction remain useful.
This guide deliberately focuses on one concrete gameplay problem: how to build and operate an effective Aniimo team around BREAK windows. It is not intended as a general introduction to every creature, region, or system in the game. Instead, it follows the practical order in which a player actually makes combat decisions: what to look for when choosing a creature, how to create a functional four-slot roster, how to prepare before a fight, how to open with a BREAK-oriented sequence, when to Twine, how to exploit the vulnerability window, how to recover when the rotation fails, and how to adapt the same system for tougher encounters and multiplayer.
1. Start by Understanding Why BREAK Is the Center of This Team-Building Strategy
The first mistake many new players make is measuring a combat Aniimo almost entirely by visible damage. A creature with an impressive attack stat may look like the obvious centerpiece, but difficult real-time encounters are not always solved by attacking harder from the first second. Aniimo’s combat system gives you another layer to manage: BREAK. Official Aniimo guidance explains that inflicting BREAK damage can improve the chance of capturing a target, while the real-time combat system is built around active ability use rather than a traditional turn structure. That makes BREAK more than a secondary mechanic. It becomes a major part of controlling the encounter.
Think of a difficult fight as having two separate questions.
The first is: How do I make the enemy vulnerable?
The second is: What do I do while it is vulnerable?
Your BREAK-oriented creatures answer the first question. Your DPS answers the second. Your healer answers the third question that players often forget: How do I survive long enough to repeat the sequence?
Once you divide the fight this way, team construction becomes much easier. You are no longer asking which Aniimo is strongest in isolation. You are asking whether your roster can reliably create and capitalize on a damage window.
The basic four-job structure
For a focused BREAK team, build around four practical functions instead of forcing every Aniimo into the same damage role:
- Breaker: Your main source of BREAK pressure.
- DPS: The creature that converts the vulnerability window into meaningful damage.
- Healer: The creature that keeps your team healthy enough to repeat the rotation.
- Flexible Support: The creature that solves the encounter’s specific problem through buffs, debuffs, cleansing, energy support, control, secondary healing, or another utility effect.
The official Aniimo index illustrates why this approach works. Helmwhelp, for example, is classified around the BREAK role and has a high listed BREAK value, while Stellarys is categorized as DPS and has a high ATK value. Glacy is a healing-focused creature, while Flutternym combines healing with utility such as debuff removal.
Those distinctions matter. Aniimo is not designed around a single “strongest creature” that performs every job equally well. Its creatures are built with different roles, traits, skills, and utility, and those differences become more important as encounters become harder.
Why role overlap can actually hurt your team
At first glance, putting several damage dealers into one team sounds attractive. More damage should mean faster kills. The problem is that damage only matters while you are alive and able to maintain pressure.
Suppose your first three Aniimo are all aggressive attackers. You trigger BREAK and your damage is impressive. But after the vulnerability ends, the enemy launches a strong attack, your team loses health, and there is no reliable recovery. Your damage-focused composition may have excellent numbers in one moment and terrible performance over the full fight.
A balanced team often produces less impressive individual damage while producing more useful damage across the entire encounter.
2. Choose Your First Combat Core Before You Start Spending Resources
During the opening portion of Aniimo, one of the biggest mistakes is spreading resources across too many creatures before you understand what your roster actually needs.
Aniimo allows creatures to gain experience through conventional progression as well as combat-related activities, and the temptation is to level everything you catch. That feels productive, but it often creates a shallow roster where nothing is developed enough to perform a reliable role.
Instead, build a temporary combat core.
You do not need your perfect endgame team immediately. You need four creatures that allow you to learn the game’s combat loop:
- One dependable Breaker.
- One damage dealer.
- One healer.
- One flexible utility creature.
That setup gives you something much more valuable than a powerful collection: a repeatable combat structure.
Use roles before names
A common trap in creature-collection games is becoming attached to a creature before understanding what that creature actually contributes.
Aniimo makes role-based evaluation particularly important because a creature can have advantages outside raw damage. Its attributes, passive effect, active skills, Pathfinding ability, movement characteristics, and elemental identity can all matter.
Stellarys is a good example. Its role is listed as DPS, but the useful information is not simply that it has high attack. Its kit contains a trait that rewards skill usage by improving its basic attacks for a period of time. That changes how you should play it. The question is not merely “How much damage does Stellarys have?” but “What sequence allows Stellarys to deal its best damage?”
The same logic applies to healers.
Glacy is categorized as a healing Aniimo and provides direct and area-based healing. Flutternym also specializes in healing, but its toolkit includes additional utility such as debuff removal and effects that can help the team sustain itself.
These are different solutions even though they technically occupy the same broad role.
Early resource rule
Until you understand your combat fundamentals, concentrate your major investment on a small roster.
Before committing heavily to a new Aniimo, ask:
- Can this creature reliably perform its intended role?
- Can I control its abilities comfortably in real-time combat?
- Does it improve the entire team, or only its own performance?
- Does it help create or exploit a BREAK cycle?
- Does replacing an existing creature solve an actual problem?
That final question is particularly important.
Do not replace an established team member merely because another Aniimo has a higher visible number. Replace it when the new creature makes the complete combat loop better.
How to build a temporary progression team
Your early team does not need perfect synergy. It needs dependable coverage.
For example:
Slot 1 — Breaker:
A creature that can reliably build BREAK while surviving frontline pressure.
Slot 2 — DPS:
A creature that can deliver concentrated damage once the target enters its vulnerable state.
Slot 3 — Healer:
A reliable source of recovery that allows you to repeat the rotation.
Slot 4 — Utility:
A flexible answer to whatever your team is currently struggling against.
Once you understand why each slot exists, replacing individual creatures becomes much easier.

3. Build Your Breaker Around Reliability, Not Just the Highest BREAK Number
A high BREAK value is obviously useful, but the highest listed BREAK number does not automatically mean that a creature is the best Breaker for every situation.
Helmwhelp is a useful example. Its official entry gives it a high BREAK value and a trait that can increase its BREAK efficiency after it is attacked. It also has defensive utility associated with its combat skills.
That combination matters because it means the creature is not simply a stationary damage meter. It can interact with the enemy’s pressure and use that pressure to improve its own function.
When evaluating a Breaker, look at four things in order:
- How much BREAK pressure can it actually create?
- How reliably can it hit the target?
- How well does it survive while doing its job?
- How well does it fit the specific enemy’s behavior?
The fourth question is often ignored.
A Breaker with fantastic theoretical output is not very useful if the enemy spends the entire battle moving outside its effective range.
How to operate the Breaker without wasting the opening
Your first objective is to establish contact while avoiding unnecessary damage.
Do not enter the fight and immediately spend everything.
Instead, learn the enemy’s opening pattern.
Is it going to rush you?
Does it attack in a predictable direction?
Does it create an area you need to leave?
Does it pause after a specific animation?
Those moments matter because a Breaker performs best when its attacks connect consistently.
Use lower-risk actions while you establish positioning. Save your strongest BREAK-generating opportunities for the moments when the target is easier to hit.
Helmwhelp is especially interesting because of the interaction between its defensive characteristics and BREAK-oriented role. If a trait rewards taking damage, that does not mean you should intentionally absorb every attack. It means you should understand controlled exposure.
Take enough pressure to make use of the mechanic, but do not confuse a defensive trait with invulnerability.
The Breaker checklist before a serious encounter
Before beginning a difficult fight, ask yourself:
- Is my Breaker healthy?
- Can it stay within effective range of the target?
- Does it have enough survivability to remain active?
- Do I understand its safest way to generate BREAK?
- Do I know when I should disengage?
- Is the healer ready if the target starts focusing it?
The objective is not maximum damage during the opening seconds.
The objective is to reach the first BREAK window with the rest of the team still healthy.
4. Add a DPS That Can Convert a Break Window Into Real Damage
Once your Breaker is selected, the next question is not “Which Aniimo has the biggest attack?”
The better question is:
Which DPS gets the most value from a short period of enemy vulnerability?
This distinction is critical.
A damage dealer that performs excellent sustained damage against a normal target may be less useful for a BREAK-based rotation than a creature capable of concentrating its output into a short window.
Stellarys demonstrates this concept particularly well. It is classified as DPS and has a high ATK value, but the important part of its kit is how its skills interact with subsequent basic attacks. Its Grand Sorcerer trait can make basic attacks stronger after skill usage, which creates a natural sequence instead of encouraging random button presses.
Use the BREAK window as a scripted damage phase
Imagine that the Breaker is close to triggering BREAK.
At that point, your DPS should already be prepared.
Do not wait until the enemy is vulnerable and then begin thinking about what your DPS should do.
The ideal sequence is:
Prepare → BREAK → DPS setup → Burst → Reset
The setup phase matters.
A self-buff that takes a moment to activate may be extremely valuable during a vulnerability window if it increases the output of your next several attacks.
The same skill could be inefficient when used randomly against a healthy target.
That is why strong players think in sequences rather than individual buttons.
Example: skill into basic attacks
Stellarys is a useful illustration because its passive rewards skill usage followed by improved basic attacks.
Instead of thinking:
“Use the strongest attack whenever it is ready.”
think:
“Which action activates my next damage increase, and how do I make sure the target is vulnerable when I take advantage of it?”
That shift in thinking can improve the performance of many DPS characters, even beyond Stellarys.
Do not confuse burst with constant DPS
A burst-oriented DPS does not need to attack continuously.
In fact, sometimes constantly attacking outside the important window is actively harmful.
Consider the following:
The enemy is currently strong.
Your Breaker is building BREAK.
Your DPS uses expensive abilities anyway.
Then the enemy becomes vulnerable.
Your DPS has already spent resources.
The result is a weak BREAK phase.
A better approach is to preserve the right tools for the right moment.
The DPS can be relatively quiet during the neutral phase and extremely aggressive during the vulnerability phase.
That contrast is the point.
Positioning matters more during BREAK than players expect
Players often think the BREAK window automatically guarantees damage.
It does not.
You can still waste the window through poor positioning.
If the target is moving across an arena and your DPS must spend several seconds chasing it, a significant portion of your advantage disappears.
Before the vulnerability opens, think about where the DPS needs to be.
A strong Breaker rotation is therefore partly a positioning exercise:
- Breaker engages from a controlled angle.
- DPS remains close enough to transition quickly.
- BREAK is triggered.
- DPS enters immediately.
- Damage sequence begins without unnecessary movement.
That small amount of preparation can make a larger difference than another minor stat increase.
5. How to Choose Between Glacy, Flutternym, and Other Healing Styles
The healer is the slot that determines whether your BREAK rotation can actually be repeated.
A team might survive one strong opening without dedicated healing. Difficult content eventually punishes that approach.
The important question is not:
Which healer restores the most health?
The better question is:
Which healer solves the way my team is actually losing fights?
Glacy and Flutternym demonstrate why this distinction matters.
Glacy: direct and area-based recovery
Glacy is categorized as a healing Aniimo and has a substantial HP value. Its kit includes direct healing as well as a healing area through abilities such as Spring of Life.
This makes Glacy particularly interesting in encounters where you can control the battlefield around the healing area.
If your team frequently fights in relatively predictable positions, an area heal can provide efficient sustained recovery rather than forcing you to depend entirely on emergency healing.
That gives you another option:
Instead of constantly responding to damage after it happens, you can establish an area that encourages your team to remain healthy during the encounter.
Flutternym: healing plus utility
Flutternym approaches the healing role differently.
Its toolkit includes healing, but it also offers utility such as debuff removal and team-support effects.
This becomes important when the main problem is not raw incoming damage.
Suppose your team is losing because:
- a debuff is repeatedly weakening your damage output,
- your resource cycle becomes inefficient,
- your damage dealer is repeatedly disrupted,
- or the team has difficulty sustaining itself between BREAK windows.
In those situations, additional utility may be worth more than simply increasing the size of every heal.
Pick the healer according to the failure you are experiencing
Use your last few losses as evidence.
You die to sudden damage:
Prioritize emergency recovery and survivability.
You lose because you cannot stay inside healing zones:
Use healing that is easier to apply while moving.
You are constantly affected by debuffs:
Cleansing utility becomes more valuable.
You survive but cannot sustain the fight:
Prioritize resource efficiency and repeatable healing.
Your healer should not be permanently active
Another common mistake is leaving the healer active for too long.
Your healer exists to stabilize the team.
That does not mean it should perform every stage of the combat rotation.
A better pattern is:
Breaker creates the opportunity → DPS exploits it → healer restores stability → Breaker returns
The healer is part of the cycle, not the center of every moment.
How to avoid emergency-healing addiction
If your healer spends every fight recovering damage immediately after it happens, your team may have a positioning problem.
Healing should support good combat decisions, not permanently compensate for bad ones.
Whenever possible, prevent avoidable damage rather than healing it repeatedly.
That allows the healer’s resources to be saved for damage that you genuinely cannot avoid.
6. Use the Fourth Slot to Fix the Team’s Weakest Link
The fourth slot is where a decent BREAK team becomes a flexible team.
Do not automatically put another DPS here.
Instead, ask:
What prevents my current team from completing its rotation?
Melloblum is a strong example of why support creatures can be valuable even when they are not the main damage dealer. Its official classification is Support, but it also has useful BREAK characteristics and abilities capable of helping the team through buffs, cleansing and utility effects.
Its Rose Garden ability, for example, can improve Grass critical damage for allies within the relevant area.
This illustrates an important team-building principle:
A support creature does not need to have the highest personal damage to increase the team’s overall damage.
Determine your team’s weakest link
After several encounters, write down what actually goes wrong.
Maybe you reach BREAK consistently, but the enemy does not lose enough HP.
Maybe your DPS is strong, but your team dies before the second rotation.
Maybe you survive comfortably, but your resources disappear too quickly.
Maybe a status effect repeatedly disrupts your combat flow.
The fourth slot exists to solve one of those problems.
Example decision tree
Problem: Breaker cannot create BREAK quickly enough
Look for better BREAK pressure, improved survivability, or more reliable positioning.
Problem: BREAK happens, but enemy HP barely moves
Improve your damage amplification or replace the DPS.
Problem: First rotation works, second rotation fails
Improve healing, resource management, or defensive utility.
Problem: Team constantly loses to debuffs
Add cleansing.
Problem: Team survives but cannot maintain pressure
Add energy-related support or a DPS with better sustained output.
Why another DPS is not always the answer
Suppose your first DPS already kills half the enemy’s health during every BREAK window.
Adding another DPS may sound efficient.
But if your team then lacks cleansing or recovery, the total fight may actually become harder.
Now imagine replacing that second DPS with a utility creature that strengthens your main attacker, provides healing support, or reduces the effect of enemy debuffs.
Your character screen may show less raw attack.
Your actual fight may become much easier.
That is the difference between building a roster around individual statistics and building one around a complete combat cycle.
7. How to Prepare the Rotation Before You Enter the Fight
The strongest BREAK sequence begins before the enemy becomes vulnerable.
Preparation in Aniimo is not a separate turn-based planning phase. It is about entering combat with the correct creature, positioning and resources.
Before a serious encounter, determine exactly what you want your first several actions to look like.
A simple plan might be:
Breaker opens → Support prepares → BREAK → DPS bursts → Healer stabilizes
The exact order can change, but you should know the intended function of each slot.
Step 1: Check your active roster
Before approaching the enemy, confirm:
- Who is your active Breaker?
- Who is your primary DPS?
- Which creature handles healing?
- What does the fourth slot provide?
- Which creature do you plan to Twine into?
That preparation sounds simple, but it prevents many unnecessary mistakes.
Step 2: Check elemental relationships
Aniimo provides information that can help players understand type matchups.
Use it.
Do not rely entirely on memory if you are uncertain.
When the encounter becomes difficult, even small advantages in elemental efficiency can become more important because they affect how quickly you can reach your next BREAK phase.
Step 3: Examine your resource situation
If your DPS requires a particular setup before it reaches maximum efficiency, avoid entering the encounter in a state where you cannot complete the sequence.
Similarly, do not spend every expensive healing or support ability before the fight properly begins.
You are preparing for a cycle rather than a single attack.
Step 4: Think about where the first BREAK will occur
Where will the enemy be when you trigger BREAK?
Near a wall?
In the center?
Near your healer?
In a hazardous zone?
This matters because the location of the BREAK window determines how efficiently your DPS can use it.
Pre-fight checklist
Before a difficult engagement:
- Breaker is healthy.
- DPS is ready.
- Healer has the required recovery tools.
- Fourth slot addresses the encounter.
- You know your opening creature.
- You understand the relevant elemental matchup.
- You know how you want to trigger the first BREAK.
- You have a plan for what happens immediately after BREAK.
This preparation may take less than a minute, but it can save several minutes of failed combat.
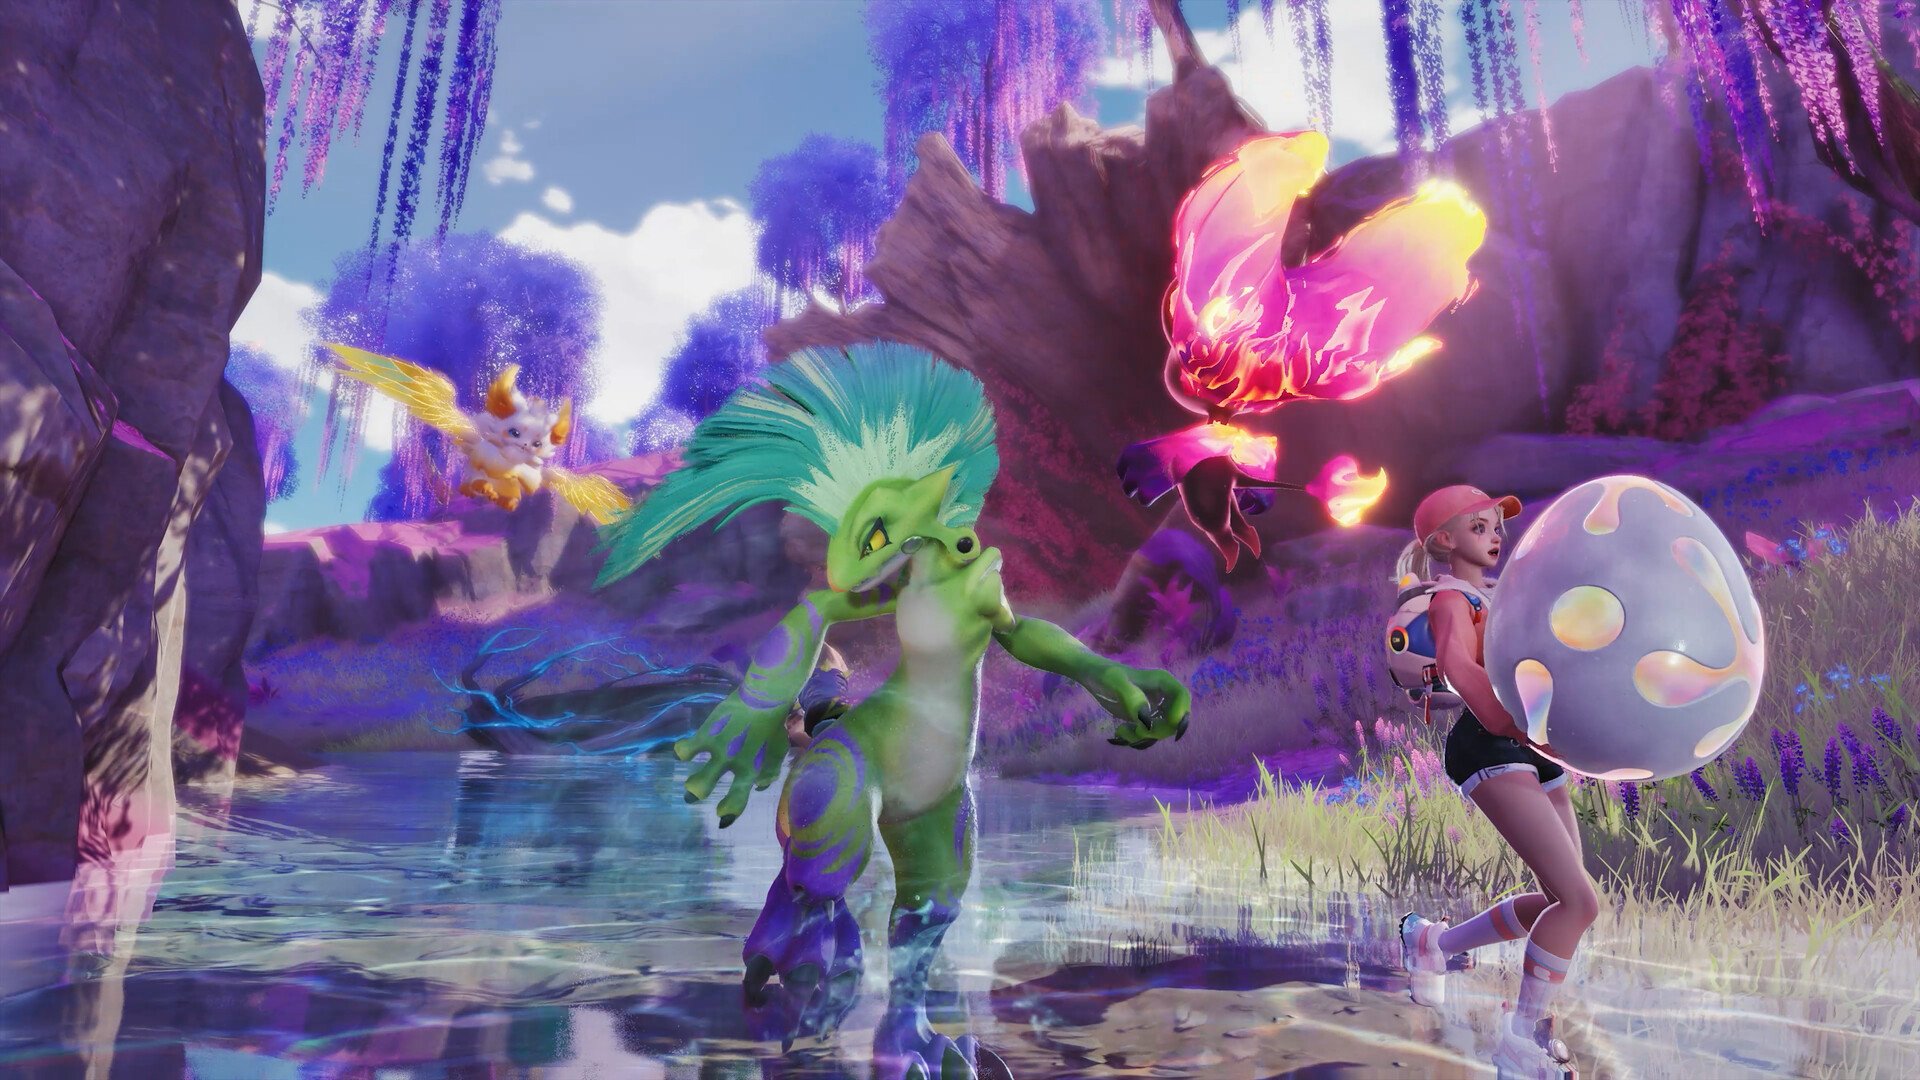
8. The Exact Break-to-DPS Sequence: A Practical Combat Rotation
Now the different pieces can be combined into a repeatable rotation.
Step 1 — Engage with the Breaker
Start with the creature responsible for BREAK.
Do not immediately use every skill.
First establish position.
Watch the enemy’s attack pattern.
Learn how close you need to stand.
Step 2 — Build BREAK deliberately
Use your most reliable BREAK-generating attacks.
Avoid wasting time attacking from ineffective range.
Avoid taking unnecessary hits.
If your Breaker has a mechanic that benefits from controlled incoming damage, use it intelligently rather than deliberately standing inside every enemy attack.
Step 3 — Prepare your DPS before the target becomes vulnerable
This is the part many players skip.
Your DPS should be mentally and physically ready to enter.
You should already know:
- which skill comes first,
- which attack follows,
- whether you need a self-buff,
- how long the sequence takes,
- and when you should stop.
Step 4 — Trigger BREAK
When the enemy enters the vulnerable state, the combat phase changes.
This is when your team should become more aggressive.
The Breaker has done its job.
Now the DPS takes over.
Step 5 — Twine into the correct combat role
Twine is one of Aniimo’s defining systems because it allows the Pathfinder to directly inhabit an Aniimo and use its abilities in the active combat experience.
That makes the timing of the transition important.
Do not waste the most valuable part of the vulnerability window deciding what you should do.
Step 6 — Execute the DPS sequence
If your DPS has a setup ability that increases subsequent attacks, use that first.
Then activate the highest-value attacks in the sequence.
Do not automatically use the biggest-looking attack first.
Sometimes the skill that increases the next five seconds of damage is more valuable than the largest single hit.
Step 7 — Stop chasing the window after it ends
This is a major advanced skill.
When the target leaves BREAK, do not continue your burst as though nothing changed.
Reset.
Return to your Breaker or support.
Prepare for the next cycle.
Step 8 — Repeat
The goal is a repeatable rhythm:
Engage → Build BREAK → Vulnerability → Burst → Recover → Repeat
That rhythm is the foundation of effective combat team building.
Why this rotation works
It divides responsibility.
The Breaker creates the opportunity.
The DPS exploits it.
The healer ensures the team can continue.
The support improves whichever of those jobs needs help.
That is significantly more reliable than having four creatures attack continuously without coordination.
Aniimo’s systems also make this timing particularly relevant because BREAK is not merely a visual effect. Official information has connected BREAK states to meaningful combat interactions, including damage-related effects and capture advantages.
9. How to Fix the Most Common Break-Rotation Failures
Even a well-built team can fail if the rotation is poorly executed.
The most useful way to improve is not to immediately change your team.
First, identify the exact point where the rotation breaks down.
Failure 1: The BREAK bar moves too slowly
Do not immediately add another DPS.
First examine the Breaker.
Are its attacks connecting?
Are you standing at the right distance?
Are you using the most efficient abilities?
Are you being forced away from the target?
Are you swapping out too often?
A Breaker’s theoretical potential means little without uptime.
Failure 2: You reach BREAK but waste the vulnerability window
This is usually a sequencing problem.
Common reasons include:
- DPS enters too late.
- DPS starts with the wrong ability.
- You need to reposition.
- Resources were spent too early.
- The damage sequence is longer than the BREAK window.
- You are using a sustained-damage skill when a burst sequence is needed.
Study your DPS like a combo rather than a list of independent skills.
Failure 3: You survive the first rotation but lose the second
This usually points to sustainability.
Ask:
- Did the healer use everything during the opening?
- Did you take unnecessary damage?
- Did the team spend resources too aggressively?
- Is the enemy applying debuffs?
- Does your support slot actually solve the encounter?
A team that wins one rotation and collapses afterward is not truly stable.
Failure 4: Your team constantly suffers from status effects
This is one of the clearest situations where utility can beat raw damage.
If a debuff repeatedly interrupts your damage cycle, the value of cleansing can be much greater than adding another attack skill.
Flutternym’s utility is particularly relevant to this kind of problem because its healing identity is combined with effects that can help remove negative conditions.
Failure 5: You panic after a failed BREAK
This is more important than it sounds.
Suppose you trigger BREAK but your DPS misses several attacks.
The worst response is to keep attacking recklessly to compensate.
The better response is to reset.
Re-enter your neutral phase.
Build the next BREAK.
Try again.
The reset rule
Whenever your planned damage window fails, return to the normal combat loop.
Do not chase lost damage.
This is one of the clearest differences between inexperienced and experienced real-time players.
An inexperienced player tries to recover a mistake with more aggression.
An experienced player limits the mistake and prepares for the next opportunity.
10. Advanced Break Team Building for Alphas, Difficult Encounters, and Multiplayer
Once the basic rotation becomes comfortable, you can specialize the same system for harder content.
The first specialization is elemental adaptation.
Aniimo’s official information emphasizes type matchups in difficult Alpha encounters and provides in-game information that can help players identify those relationships.
The underlying team structure does not need to change.
Instead, change the individual creatures filling each role.
Your job remains:
Create BREAK → Exploit BREAK → Survive → Repeat
Only the tools change.
Adapting to stronger Alpha encounters
Alphas often punish teams that rely on a single fixed strategy.
For easier encounters, you may be able to brute-force mistakes.
Against stronger enemies, those mistakes become expensive.
That means your Breaker should be selected according to the encounter rather than permanently locked as the same creature.
The same applies to your DPS.
A creature that performs perfectly against one enemy may be much less efficient against another because of elemental interactions, movement patterns, range requirements, or vulnerability timing.
Build a roster of interchangeable roles
An advanced player should gradually stop thinking in terms of one four-creature squad.
Instead, think of a collection of interchangeable roles.
For example:
BREAK Option A:
Your strongest general-purpose Breaker.
BREAK Option B:
A creature better suited to a specific element or boss behavior.
DPS Option A:
Your strongest burst attacker.
DPS Option B:
A more mobile damage dealer for highly mobile targets.
Healer Option A:
Strong direct recovery.
Healer Option B:
Healing plus cleansing or utility.
Support Option A:
Damage amplification.
Support Option B:
Control, defense or resource support.
This allows your roster to adapt without requiring you to relearn the entire combat system.
Terrain and exploration can also influence team decisions
Aniimo mixes combat with exploration systems, meaning creature selection is not always about combat statistics.
Some Aniimo have Pathfinding abilities that influence exploration.
Others can benefit from environmental conditions.
Glacy, for example, has an interaction with water terrain that can influence its energy efficiency.
Stellarys has Fly as a Pathfinding ability.
These details can matter when planning a larger progression route because the team you use to explore may be slightly different from the team you use for a pure combat challenge.
Multiplayer changes the value of coordination
In multiplayer activities, role clarity becomes even more important.
For example, in team-oriented activities such as Egg Heist, players have to deal with more than a single predictable enemy.
That means your individual BREAK window is no longer the only important timing consideration.
Communication becomes valuable.
If multiple players are simultaneously ready to unload their strongest abilities, it may be beneficial to coordinate those attacks around the same vulnerability window.
Instead of everybody independently doing the same thing, the group can divide responsibilities:
- One player creates pressure.
- One player focuses on damage.
- One player provides recovery.
- One player handles utility or a secondary target.
How to evolve your roster from beginner to advanced
At the beginner level, your priority is:
Functional coverage.
Get the four roles working.
At the intermediate level, your priority becomes:
Rotation consistency.
You should be able to trigger BREAK repeatedly without your healer constantly rescuing avoidable mistakes.
At the advanced level, your priority becomes:
Encounter specialization.
Now you need alternative creatures for different situations.
You may change:
- Breaker based on element.
- DPS based on movement.
- Healer based on damage pattern.
- Support based on enemy mechanics.
- Entire combinations based on multiplayer coordination.
That is when team building becomes much deeper than simply raising the level of your strongest four Aniimo.
Advanced roster-building template
A strong long-term roster can be organized like this:
Core Breaker:
High BREAK pressure with survivability appropriate for the encounter.
Primary DPS:
Strong burst damage with a sequence suited to short vulnerability windows.
Primary Healer:
Reliable healing that matches the way the team takes damage.
Utility Flex:
A creature chosen specifically for buffs, cleansing, control, energy support, secondary healing, or another encounter-specific need.
Reserve Alternatives:
Additional creatures developed enough to replace individual roles when an element, environment or enemy mechanic makes the default choice inefficient.
The final skill: predicting the next BREAK
Once the basic rotation becomes natural, stop reacting entirely to the current state of the battle.
Start thinking about the next state.
When your Breaker is approaching the next BREAK threshold, ask:
- Where will the enemy be?
- Which DPS should enter?
- Which skill starts the DPS sequence?
- How much healing will I need afterward?
- Which support effect should be active?
- Should I Twine now or wait?
- What happens if the enemy leaves the vulnerable state early?
That level of preparation turns the fight from reaction into planning.
And that is ultimately the biggest advantage of a well-structured team.
Conclusion
The most practical way to improve at Aniimo combat is not to memorize a giant creature ranking. It is to build a team that performs a repeatable sequence.
Start with a dependable Breaker.
Choose a DPS that can convert the resulting vulnerability into concentrated damage.
Use a healer that matches the actual way your team takes damage.
Leave the final slot flexible enough to solve the encounter’s biggest weakness.
Then practice the complete cycle:
Engage → Build BREAK → Trigger vulnerability → Twine into the correct Aniimo → Execute the damage sequence → Recover → Repeat
Official Aniimo information supports this approach from several directions. Twine is a central combat system, type matchups are built into the game, BREAK has meaningful gameplay applications, and individual Aniimo are designed with differentiated roles, traits, and abilities.
Helmwhelp demonstrates how a dedicated BREAK-oriented creature can combine pressure with survivability.
Stellarys demonstrates how a DPS can become stronger through deliberate skill sequencing rather than random ability usage.
Glacy demonstrates direct and area-based healing.
Flutternym shows how healing can be combined with cleansing and utility.
Melloblum demonstrates that support abilities can improve the overall effectiveness of a team instead of simply adding another source of damage.
The exact numbers, traits, and balance of individual creatures can change as Aniimo receives updates, but the underlying combat logic is much more durable.
Build around roles.
Understand the encounter.
Protect your Breaker.
Prepare your DPS before the vulnerability window.
Use BREAK as the beginning of the damage phase.
Do not waste burst outside that window.
Use healing to preserve your next rotation rather than permanently repairing avoidable mistakes.
And most importantly, learn to reset after a failed rotation instead of chasing lost damage.
When these principles become automatic, difficult Aniimo fights become much less chaotic. You stop pressing abilities simply because they are available and start using them because they belong to a specific part of the fight.
The real objective is not to build a team that looks powerful on the character screen.
It is to build a team whose abilities fit together so naturally that every BREAK creates another opportunity to control the encounter.
That is the foundation of efficient Aniimo combat.